Rotating a heavy drum 180 degrees is not a simple strength exercise. It combines load control, balance, friction, and pinch-point exposure. The drum may look stable, yet its contents can shift suddenly. A wet floor, damaged rim, or uneven pallet can change the entire movement.
The Liberty Mutual Workplace Safety Index estimates that overexertion injuries cost U.S. employers tens of billions of dollars annually. Its findings underline a practical truth: small handling errors can create expensive, life-changing injuries. OSHA’s material-handling guidance requires loads to remain stable and secured, while HSE’s Manual Handling at Work guidance recommends assessing the task, load, environment, and worker capability. These principles apply directly to drum rotation.
So, how should a team approach the question, “How to safely lift and rotate heavy drums 180 degrees?” The answer begins with equipment selection, not physical effort. A drum lifter, cradle, forklift attachment, or controlled drum rotator can reduce manual force. Inspect the drum, confirm its weight, clear the travel path, and identify pinch zones before moving. Keep feet outside the drum’s projected path. Maintain a firm grip without placing hands beneath the rim.
A plan can still fail.
Workers may rush when production pressure rises. That is where a second person, a spotter, and a short verbal command become valuable. The following seven tips focus on controlled movement, verified equipment, body positioning, and honest risk assessment. Some procedures need improvement after real observations, because written instructions rarely capture every workplace condition.
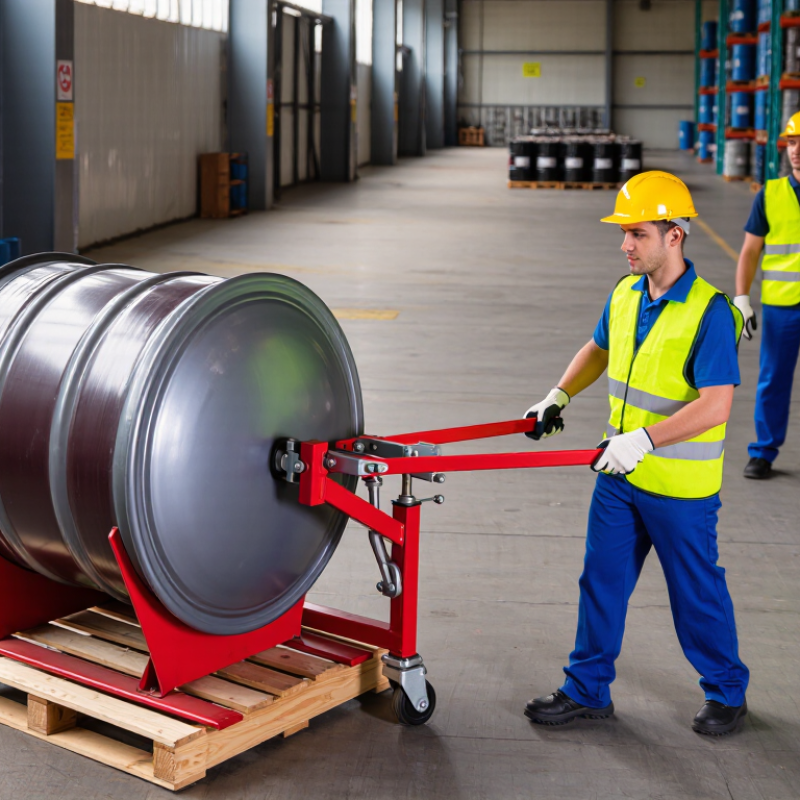
Rotating a heavy drum 180 degrees can release stored energy without warning. Its center of gravity shifts quickly during the turn. Liquid residue may move inside, creating sudden imbalance. A drum that looks stable can still roll, tilt, or collapse.
Check the drum’s weight, condition, and contents before moving it. Look for damaged rims, weak seams, loose bands, and slippery surfaces. Use lifting equipment rated above the total load, including attachments. Never rely on improvised chains or worn straps. Keep hands and feet away from pinch points. A crushed glove offers no protection. Establish a clear exclusion zone, and assign one trained person to direct the movement. Everyone else should remain visible and outside the rotation path.
Move slowly and keep the drum close to the floor when practical. Stop immediately if it wobbles, catches, or shifts unexpectedly. Maintain clear communication throughout the turn. Do not stand in front of the drum or between it and a fixed object. After rotation, secure it against rolling before releasing the equipment. An uneven floor can defeat a careful plan.
The most overlooked risk is often poor preparation. A quick visual check may miss internal movement or a damaged lifting point. Recheck the setup just before rotation. If the load, equipment, or floor condition is uncertain, postpone the task and consult a qualified safety professional. Small delays are easier to manage than a sudden uncontrolled turn.
7 Tips for Safely Rotating Heavy Drums 180 Degrees
Selecting suitable equipment begins with the drum’s real weight, diameter, and center of gravity. Choose a rated drum rotator or lifting attachment with capacity above the measured load. Never rely on an estimated weight. Check the frame, chains, pins, hydraulic lines, and locking parts before use. Small damage can become serious during rotation.
Prepare a level floor with enough space for the drum’s full turning path. Remove loose tools, spilled liquid, pallets, and unnecessary personnel. Mark an exclusion zone around the equipment. Keep feet and hands outside this boundary. Chock nearby drums so they cannot roll into the work area. Confirm that doors, pipes, lights, and overhead structures will not obstruct the 180-degree movement.
Secure the drum at two stable contact points, then confirm its balance with a controlled test lift. Use a spotter who can see the entire path and communicate with the operator. Rotate slowly, using smooth controls rather than sudden force. Stop immediately if the drum shifts, tilts, or meets resistance. Keep the load close to the floor, but do not drag it. After rotation, engage the locking mechanism and inspect the drum’s final position. An imperfect setup is still a warning. Recheck it before continuing.
Before rotating a heavy drum 180 degrees, inspect it as if its contents could shift suddenly. Check the label, closure, shell, seams, chimes, and base ring. Look for bulges, deep dents, rust-through, wet patches, and distorted bungs. Do not rotate an unidentified or leaking drum. Stop the task and isolate it. A small stain can signal pressure, contamination, or a damaged liner. “It looks fine” is not an inspection record.
Confirm the drum’s actual weight, material, and center of gravity from reliable documents. Never rely on color or shape. Verify that the drum rotator, cradle, straps, and lifting points are rated above the load. Inspect wheels, pins, welds, chains, and hydraulic hoses. Remove loose tools and debris from the travel path. The floor must be level, dry, and strong enough for concentrated wheel loads.
OSHA 1910.176(b) requires stored materials to remain secure against sliding or collapse, a useful benchmark before movement.
HSE’s 2023/24 figures recorded 543,000 workers with work-related musculoskeletal disorders and 7.8 million lost working days. That scale makes pre-rotation checks more than paperwork. Keep people outside swing and crush zones. Test the equipment with minimal, controlled movement before committing to 180 degrees. I would also photograph defects; memory becomes unreliable under pressure. No inspection catches everything. If the drum shifts, creaks, leaks, or behaves differently, lower it safely and reassess rather than forcing the turn.
Safe Drum Rotation: 7 Tips for a Controlled 180-Degree Turn
A heavy drum should rotate through a planned path, not by sudden force. OSHA identifies caught-between and struck-by hazards as serious workplace risks. The U.S. Bureau of Labor Statistics recorded 1,032 fatal work injuries involving falls, slips, and trips in 2023. A poorly controlled drum can create similar loss-of-balance risks.
Tip 1: Inspect the drum, floor, and rotation equipment. Remove oil, loose straps, and broken pallets. Tip 2: Check the drum’s weight and center of gravity. Tip 3: Keep hands outside pinch points. Use a rated drum handler or mechanical aid. Tip 4: Mark the full 180-degree travel zone. Keep people away. Tip 5: Assign one trained signal person. Use simple commands. Tip 6: Rotate slowly, stopping at 90 degrees for a stability check. Tip 7: Secure the drum before releasing the equipment.
NIOSH’s Revised Lifting Equation uses a 51-pound load constant only under ideal lifting conditions. Distance, twisting, poor grip, and frequency reduce that recommended limit. Drum rotation often includes all four problems. Keep the load close, avoid body twisting, and let the equipment carry the force. The weak point is usually not the machine. It is rushed communication. I still stop the task when the drum shifts unexpectedly, even if the turn looks nearly complete. HSE manual-handling guidance also supports reducing twisting and improving task control. 马会
The chart shows the intended angular progression for a controlled 180-degree drum rotation. Each checkpoint represents a planned pause to verify equipment stability, operator positioning, and clearance before continuing.
A safe 180-degree drum rotation begins with stability, not speed. Before moving it, inspect the drum for dents, leaks, bulging ends, or a damaged rim. Confirm its weight and center of gravity. HSE’s 2023/24 workplace statistics recorded 138 worker fatalities in Great Britain, showing why routine handling still demands disciplined controls.
Clear the floor first. Remove oil, loose pallets, and tools from the turning area. Keep hands away from the drum’s rolling path. Use rated handling equipment, and check that its capacity exceeds the drum’s gross weight. OSHA requires stored materials to be secured against sliding, falling, or collapse under 29 CFR 1910.176(b). That rule supports a simple practice: control the drum before it moves.
After rotation, stop and inspect again. Confirm both ends sit flat, the drum is not rocking, and the closure remains protected. Place wedges or rated chocks on both sides, then secure the drum with a suitable restraint. Never trust friction alone on a sloped or vibrating surface. A second person should verify the final position from a safe distance. Small details matter. I have seen teams check the lifting device carefully but overlook a cracked pallet underneath. That mistake deserves reflection. Record the inspection, restraint method, and any damage before releasing the drum for storage or use.
Use a rated drum rotator or lifting attachment. Its capacity must exceed the drum’s measured gross weight. Check chains, pins, frames, hydraulic lines, and locks before use.
Use a level floor with enough space for the full turning path. Remove oil, tools, loose pallets, and spilled liquids. Mark an exclusion zone clearly.
Inspect for dents, leaks, bulging ends, damaged rims, and weak closures. Confirm the real weight and center of gravity. Estimates can mislead.
Keep hands and feet outside the rotation path. Keep nearby drums chocked. Only trained personnel should enter the controlled area.
Secure the drum at two stable contact points. Lift it slightly to check balance and movement. Stop if it tilts or shifts unexpectedly.
Assign one spotter with a clear view of the entire path. Use short, agreed commands. Conflicting signals create dangerous hesitation.
Rotate slowly with smooth controls. Keep the drum close to the floor, but never drag it. Stop around 90 degrees for a stability check.
Confirm both ends sit flat and the drum does not rock. Use rated chocks or wedges on both sides. Add a suitable restraint before releasing the equipment.
Teams may inspect the lifting device but overlook a cracked pallet underneath. I still recheck the base before continuing. Small faults matter.
Stop immediately. Do not add sudden force or place hands near the drum. Recheck the floor, attachment, balance, and travel path before restarting.
Rotating a heavy drum 180 degrees requires careful planning because unexpected rolling, shifting weight, or unstable surfaces can cause serious injuries and equipment damage. This guide explains How to safely lift and rotate heavy drums 180 degrees? Begin by identifying the drum’s weight, condition, center of gravity, and potential hazards in the work area. Select lifting and rotating equipment rated for the load, inspect it for damage, and clear the floor of obstacles, spills, and unauthorized personnel. Use appropriate protective equipment and establish clear communication among everyone involved.
Before starting, check the drum for leaks, dents, loose closures, or other defects that could affect stability. Follow a slow, controlled rotation procedure, keeping hands and feet away from pinch points and never standing in the drum’s potential path. Avoid sudden movements, overloading, or improvising with unsuitable tools. Once the drum reaches the desired position, confirm that it is stable on a level surface, secure it against rolling, and inspect the surrounding area before releasing the lifting equipment.

Bendo Lift